Whether you are a beginner or a pro, you need to learn how to organize your blog posts with ease. Blogging is becoming an incredibly popular way to engage with the targeted audience and increase repeat sales. The truth is that all successful businesses have incorporated it into their digital marketing strategies for this reason.
The challenge, however, is that a lot of work goes into blogging, and that might scare many people. Those who imagine that setting up blogs is as simple as creating some form of content and then hitting publish must think again. For your blog to be most productive, you need to choose the best layout and organize your site correctly. Let us see different ways to organize your posts that can guarantee your success within the shortest period possible.
Which is the Perfect Way to Organize Your Blog Posts?

If you are asking whether there is the best way to organize your blog posts, the ideal response is “none.” You are able to rely on your creativity to organize your blog posts and reap great results.
Imagine how fashion experts advise people to use specific ways to not only organize but also store their clothing. However, they are clear that there can be other correct ways to do this.
Just as we have seen in this illustration, you are free to choose the best option for you, provided you fully appreciate that some blog organization systems are much better than many others are. This means, if you want to discover ways to organize your content in the most professional and appealing way, you should be able to understand how the different systems work and how you can use or not utilize them.
Consequences of Failure to Organize Posts Properly
We have established that people blog to be able to reach their audience with reach. As such, if they fail to organize their content in a way that helps the readers to locate the relevant and useful content without struggling, the blogs cannot be useful to them at all. Some sites that ignore these tips are able to attract huge amounts of traffic but suffer due to an uncontrollably high bounce rate. This shows that the brands spend a lot of money and time to promote their blogs but get nothing in return.
How to Avoid the Problems with Ease?
To make life easy for your readers and encourage them to keep coming back, you need to group all your related blog posts together. Through this, you are also able to achieve a concise blog navigation structure, which is vital for ensuring you reap search engine benefits as well.
Therefore, without a doubt, I trust this section has enabled you to see why your effort to organize your blog posts is worth it.
What Differentiates Tags from Categories?
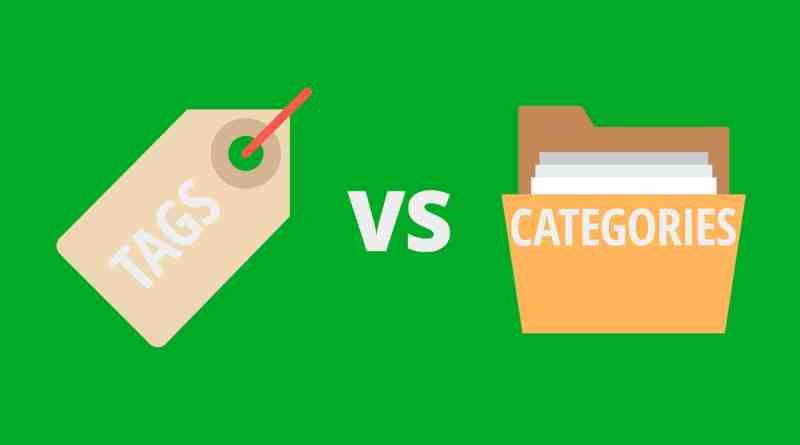
What we need to consider now is how you need to organize your blog posts using the standard methods to increase your chances of success. I know you can have many ideas on how this ought to be done, which is perfectly right. Nevertheless, let us focus on the tried-and-tested methods of using tags and categories, which are the two standard ways that WordPress recommends.
Categories are hierarchical terms, which mean they have sub-categories and more. Depending on your needs, you can create sub-sub categories and even smaller groups.
If you do not want these hierarchical categories for any reason, this is when you need to consider tags. They nonhierarchical, which means unlike categories, they do not require “subtags” and the other subdivisions.
Another essential difference is the place where you find these tools. If you want to use categories to organize your blog posts, choose them from the list of checkboxes on your WordPress interface. On the other hand, for tags, use the autocomplete box. Type into the box, and that is all.
How to Choose Between Categories and Tags?
Probably, at this level, you are asking what determines a blogger’s choice of either categories or tags. If you want to find the best option for your brand, think about how you should classify your topics. The trick here is to group the content depending on the similarities and differences that we have covered.
Have you classified your different pieces of content using the above simple formula? If you have, you are then able to make the next move and decide whether you desire to have a hierarchy or the list of checkboxes. Also, consider whether you do not want the autocomplete box and hierarchy. If you prefer the former, categories will serve you best. However, for the latter, you should opt for tags.
Not all people require only one of these blog organization tools. You may find that you need more than tags and categories. WordPress 2.8 and all the higher versions have resolved this issue. If you fall into this category, then you must use custom taxonomies, which intend to pay closer attention to after considering how to use categories and tags properly.
How Do You Use Categories to Organize Blogs Effectively?
1. Consider Your Goal

Categories help your audience to explore your blog posts that focus on common subjects. When your readers want to learn more about a particular subject, they are able to move on to the sub-categories. Besides, it empowers you to focus on a few areas on a particular topic that concerns your audience.
Other than that, you can consider categories as broad groups that give you the opportunity to post a series of blog posts for a long period. You can view categories as the table of contents of interesting literature that enables your online visitors to have a clear overall understanding of the kind of content that you feature on your blog. This way, you can use categories to entice your readers to take a lot more time on the site, if you convince them that you offer valuable information in time.
2. Be Simple
If you use difficult-to-understand names, you may register unpleasant results. It should be self-explanatory.
This also clearly implies that there are instances when you do not need to have categories. If you have a few posts that you intended to group into a single category, such as less than ten posts, it might be better to disregard the need for categories. Just as a booklet with a few pages does not require chapters, you also may not need categories in this case.
Here, your readers are able to go through the posts with incredible ease and read them, and so you do not have to struggle.
3. Develop a Strategic Plan

In the real world situation, blogs post plenty of content to address a wide variety of issues that directly or indirectly affect their audience. In the beginning, you may publish a few items, but be prepared to improve as the audience demands for more.
We advise that when you start blogging, you consider using simple categories instead of ignoring them. However, be prepared to expand with time as per your changing needs. For example, in the initial days, you can create one category for all related titles. However, as the number of posts increases, you can create sub-categories. Differentiate the post further by considering some of the predominant features that you can notice.
Useful Read: The Definitive Blog Assessment Checklist
4. Use Few Categories
Another great strategy that you need is to limit the number of main categories that you have. Often, online visitors want to save a lot of time. When they come to your site and find too many main categories to consider, most of these people readily choose to visit other blogs. To give them the best experience, therefore, you need a few categories with several sub-categories.
5. Choose the Ideal Menu
Ensure that you include your main categories in your main menu as well. The best location to feature them is on the horizontal top of your website, which provides adequate space to list a significant number of these features.
For your sub-categories, you have two main options. Many bloggers prefer to list them in drop-down menus. This way, the visitors are able to easily click on the main categories and then choose the option that they think best suits their needs. Alternatively, you can create another horizontal menu under the main one. This way, you allow your visitors to turn to the second menu whenever they want some information in the sub-categories. The only limitation is that this last option cannot accommodate as many listings as the first.
In case you are still struggling to decide which of the menus best suits your needs, you should take a break and consider the number of categories and sub-categories that you plan to list on your blog.
If you plan to have numerous, there is no doubt that you should go for the drop-down menus.
How Do You Use Tags to Organize Blogs?
If you want a tool that can help your visitors to access all the related content on a particular niche, consider tags. At this point, I hope you can see that you need tags for narrow groupings of content, which is not the case with categories where you have the chance to include sub-categories and much more whenever you find that necessary.
In this case, you do not have subtags, and so, in some way, that limits what you can feature. When you choose it, you can be sure your customers have no way to explore related posts by looking for the subsections.
- Consider the End of Tag Clouds
In the last few years, many bloggers preferred using tags on their blog sidebars. The tag clouds could help you to determine how frequently the audience was using the tags, which helped to discover the expectations of the reader. Successful bloggers used it to create quality and relevant content too.
But the way cloud tags cluttered up blogs so much, and that did not please many users and bloggers. Due to this, many people no longer love to use the tags. Today, you are more likely to find tags for a post on the same page than in any other location.
As you can see, you have an option to choose either categories or tags, and your needs offer you the best way to determine which of them to select. Nevertheless, as we mentioned earlier,
sometimes you may realize that it is not a matter of choosing either A or B. You can need both of them. In this case, use custom taxonomies to succeed.
What are Custom Taxonomies?
Let us start by providing a detailed explanation of the meaning of taxonomies.
This term “taxonomies” has been derived from Linnaean taxonomy, which is a popular biological classification system. From the onset, we can see that WordPress uses it to refer to a special way of classifying blog post. For your information, categories and tags are taxonomies, which means there is a close relationship between them and custom taxonomies.
Unlike the other grouping terms, custom taxonomies help you need to create and tailor your terms to suit your unique grouping needs.
- Nonhierarchical and Hierarchical Illustrations
How does WordPress give you the ability to create several custom groups and put them together under one umbrella? Let us say you want to create a custom post titled “Books,” you can create a new name, “Topics,” and other add names, such as “Non-Fiction” and “Adventure.” By doing this, you empower your readers to be able to sort the books by the relevant topic.
Here is a good example of hierarchical custom taxonomies. You take main topics, such as “Children” or “Fiction,” and then create the appropriate subtopics under each of them. Under “Fiction,” for instance, you can list ‘thrillers.” When you have several main categories, you then use custom taxonomies to bring them under one roof.
- How Do You Benefit from Custom Taxonomies?
In simple terms, custom taxonomies can help you when you require more than tags and categories to organize your blog posts. However, it is best to make it an option that you can resort to whenever the standard categories and tags alone cannot help you.
Where can you find custom taxonomies? They are located in blogs’ sidebars, and they appear in the form of either checkboxes or drop-down menus where they filter content. However, you can also find them on the pages of the posts.
Now that we have a clear picture of what constitutes custom taxonomy and how we can use it, we can now move on to the stage of creating them on WordPress.
Note: It is difficult to set up custom taxonomies if you do not have coding knowledge. However, that does not mean you have no solution to find a user-friendly option. In particular, you can benefit a lot from WordPress plugins.
How Can You Create Custom Taxonomies?
1. Find the Right Ideas

Since there is no perfect way to organize your blog posts, the understanding of what you can do or not is essential for aiding you to leverage your creativity to get the best results. It is in this regard that we strongly recommend that you start by finding the best ideas from different sources.
That means the process should start with the brainstorming of the relevant ideas. Write down any new idea that you think about as you plan and organize your blog posts. Evaluate these concepts and find the ones that you may need to drop.
Rely on players in different industries to find other ideas. Use social media, especially Pinterest, to find keywords and other useful blogging ideas before you get into the technical part, which is easy due to the emergence of advanced plugins.
You can find practical ways to do this below.
Beauty Blog Ideas: If you have a beauty blog and want to write a post on shaving tools, you can go to Pinterest and search “Best tools for shaving.” This way, you get plenty of suggestions, including the title that is most appropriate for you. Inspirations on the platform are endless.
From the research, you could use the type of your posts as the category. Some recommendations are giveaways, reviews, personal, or news. However, for tags, you could opt for the brands.
If appropriate, you could go for a top horizontal menu to get adequate space to list all your menus.
What would you do about personal posts? These are often considered off-topic, and you should not waste your time highlighting them on the main menu.
Food Blog Ideas: The above strategy of getting started still works here. When it comes to organizing the blog, you could use your types of recipes as categories. However, for ingredients, you could go for the ingredients. Because you also need to include the dietary considerations, such as sugar-free, vegetarian, and dairy-free, you could use them to create a custom taxonomy.
If you choose to make the blog have recipes by category, make it stand out by featuring a grid of images.
Install Simple Taxonomy Plugin
Once you know what you want to achieve, you should find the right plugins and follow the correct steps. This is the easiest way to create custom taxonomies.
1. Install Simple Taxonomy WordPress plugin and activate it. After that, go to settings, and then custom taxonomies and name give it the appropriate name. Ensure you use a simple name and write in is lowercase.
2. Indicate whether you want your custom taxonomy to be hierarchical. If this is the case, choose “true.” Otherwise, choose false for the terms to appear like tags.
3. Associate the taxonomy with the right post type. When you are asked to choose whether you desire to add more terms automatically, choose “none.”
4. Tell WordPress how you want your taxonomy to translate the user interface and then add.
Once you do this, the custom taxonomy appears under Posts with a similar interface like that of Tags and Categories.
2. Boost Your Site’s Functionality and Design

When you follow all the above procedures, you can expect to own a good blog. However, you have the option to make it excellent by installing the Blog Designer Pro as well.
The new advanced version gives you over 200 possibilities to design an outstandingly attractive blog with incredibly increased functionality. Do not forget that this WordPress plugin has at least 50 distinct blog-page templates.
Why do you think many bloggers are rushing to buy Blog Designer Pro?
The truth is that the above features are attractive. Many of them do not want to be left behind when it comes to the overall quality of their main site. However, a significant number is more concerned about the way the Blog Designer Plugin gives their categories, tags, authors and date, and single post a completely new look.
This means, once you have organized your blog posts, you have a reason to trust that your audience will appreciate your effort. However, if you use the designer plugin, they see your exceptional commitment and your high degree of professionalism.
Is there a way to can stand out from the completion? Perfect the face of your blog. To achieve this, you need to use the ideal slider. Avartan Slider is the best for you if you need a responsive WordPress slider that is easy to manage.
Also Read: Effective Habits Of Successful Bloggers
Wrapping Up
If you want to improve the experience of your audience, ensure everything on your blog is unique. As you likely already know, your content must be distinctive. The sample applies to the way in which you group your blog posts. Feel free to come with new ways to use tags, categories, and custom taxonomies. You do not even have to use them if you have a better way to organize your content.
You can create your custom taxonomies manually. Nevertheless, if you find this to be complex, use the above plugins to complete the hard work in minutes without any problems and enjoy the experience of organizing your blog posts. Do not knot forget to use the right analytics tools, such as Google Analytics, to find out how your readers are exploring your blog and respond appropriately at the right time.